Setting up Google OAuth credentials
Create a Google Cloud project
Go to the Google Cloud Console and create a project (or select an existing one).Navigate to APIs & Services in the sidebar.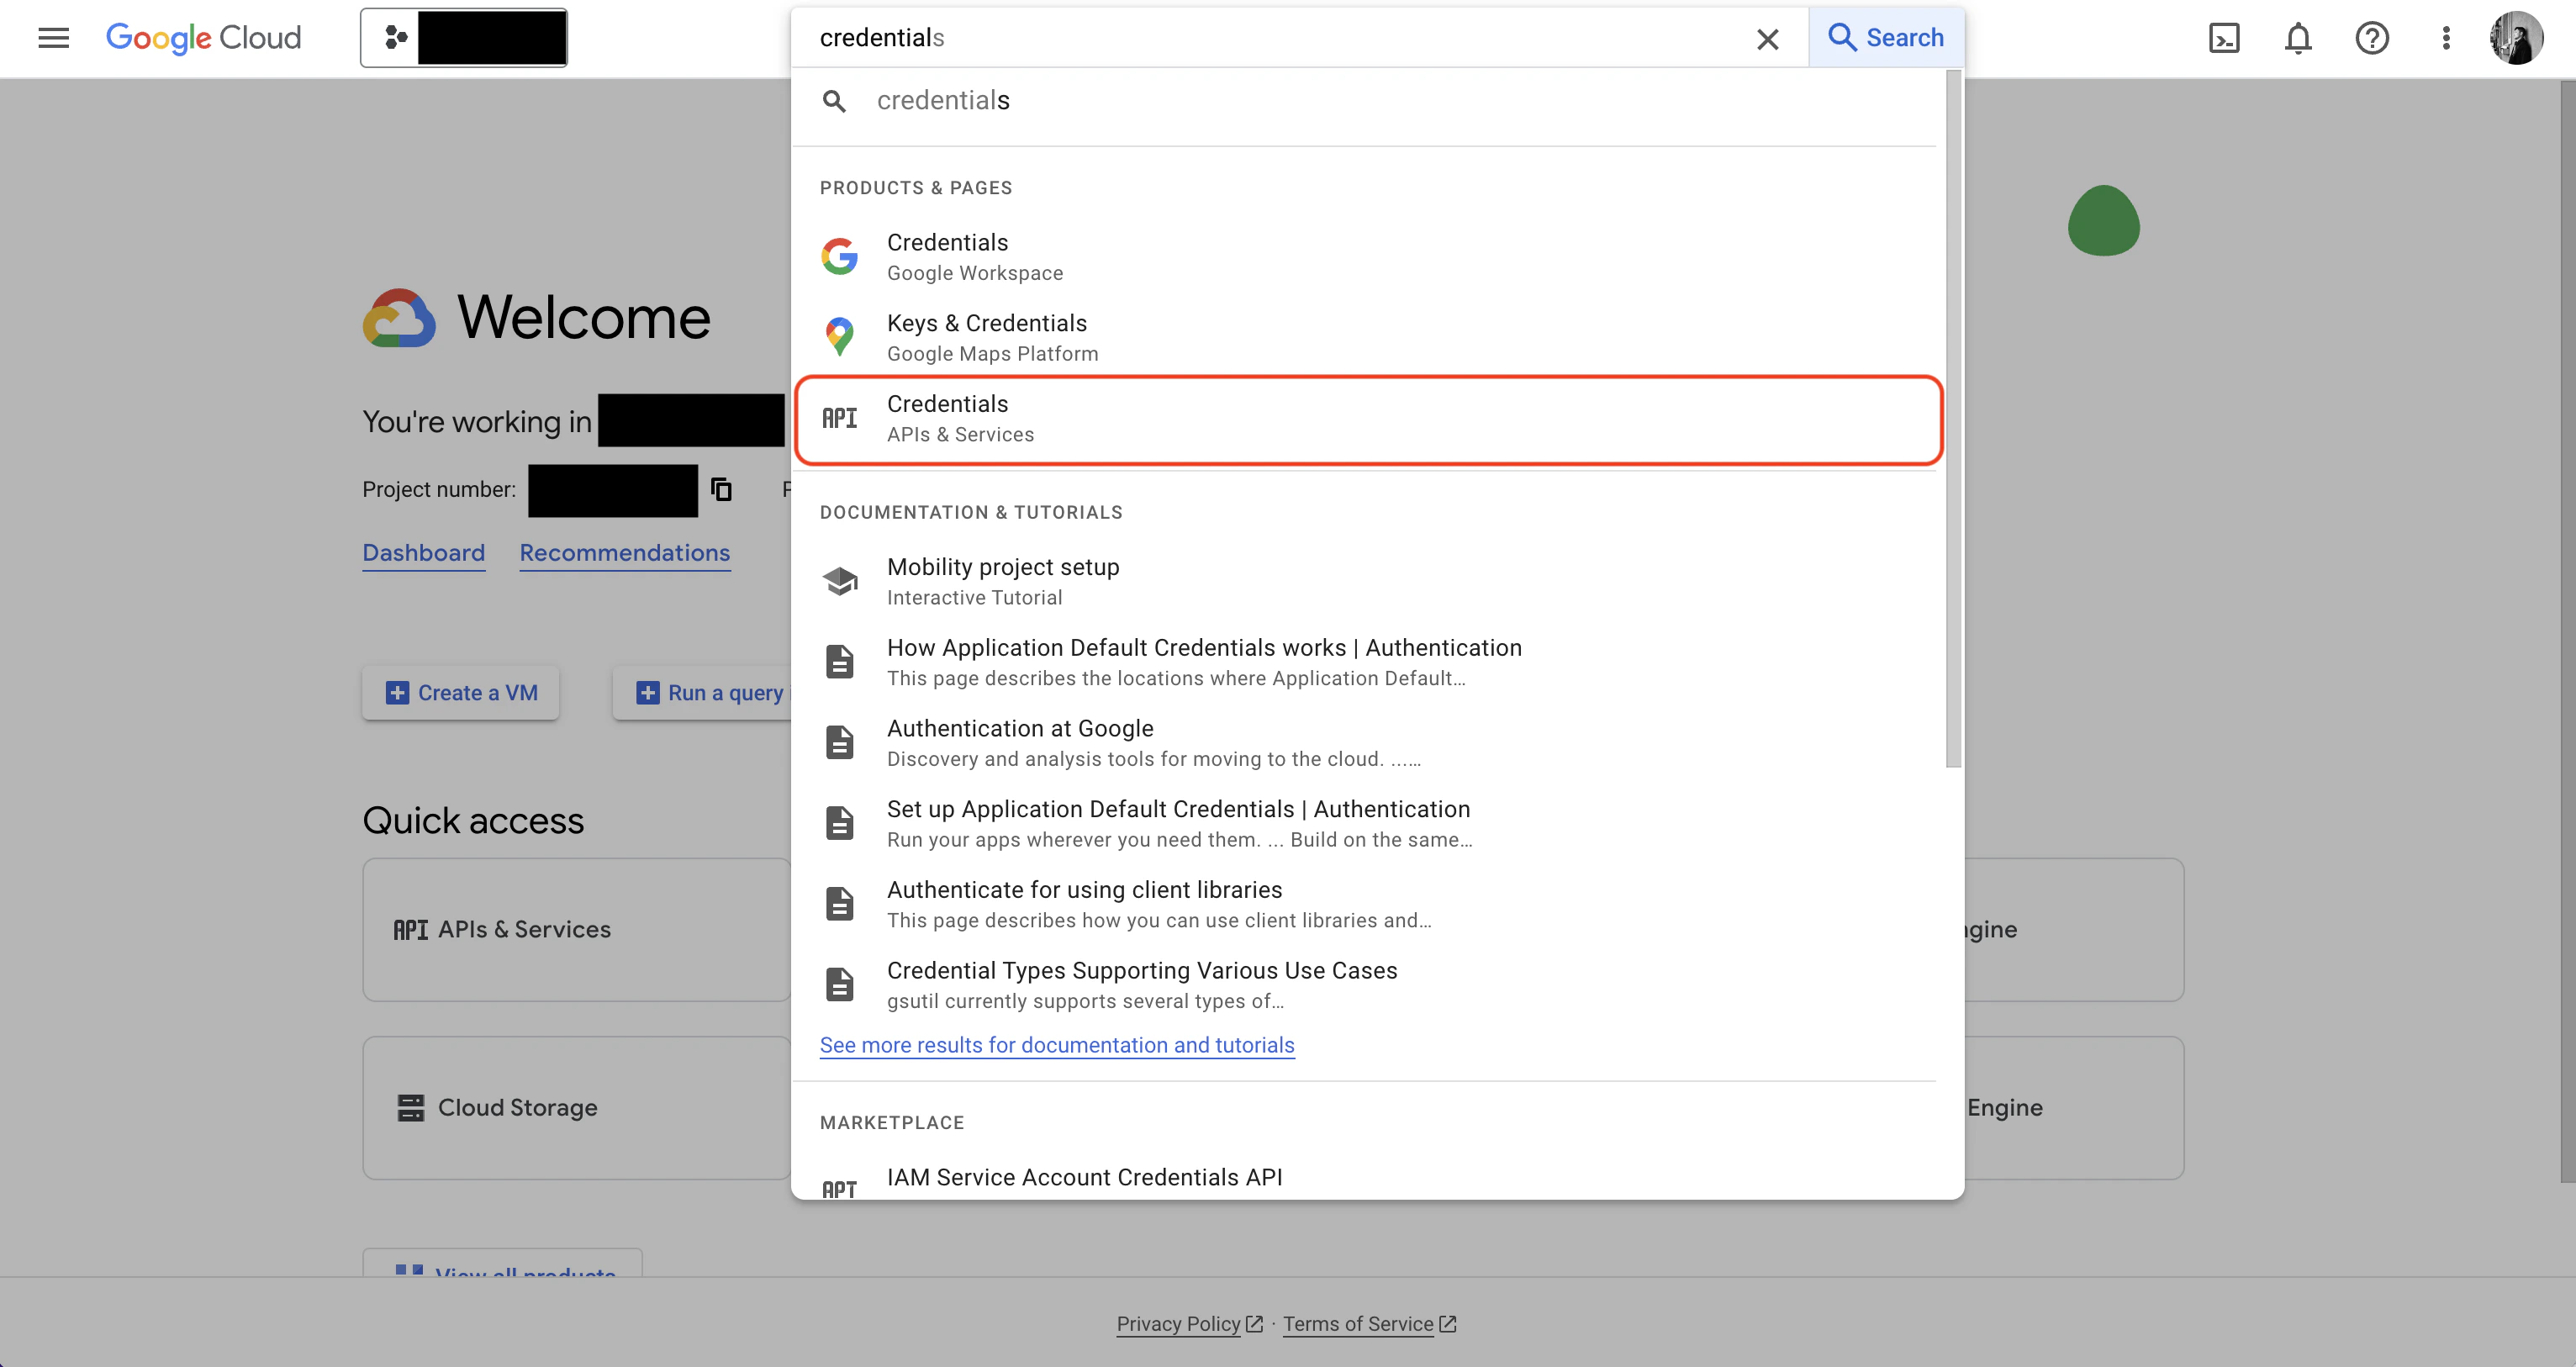
Configure the OAuth consent screen
Go to APIs & Services > OAuth consent screen. Choose External (or Internal for Google Workspace), fill in the app name and support email, and add the
email, profile, and openid scopes.Create OAuth 2.0 credentials
Go to APIs & Services > Credentials > Create Credentials > OAuth client ID. Select Web application as the type.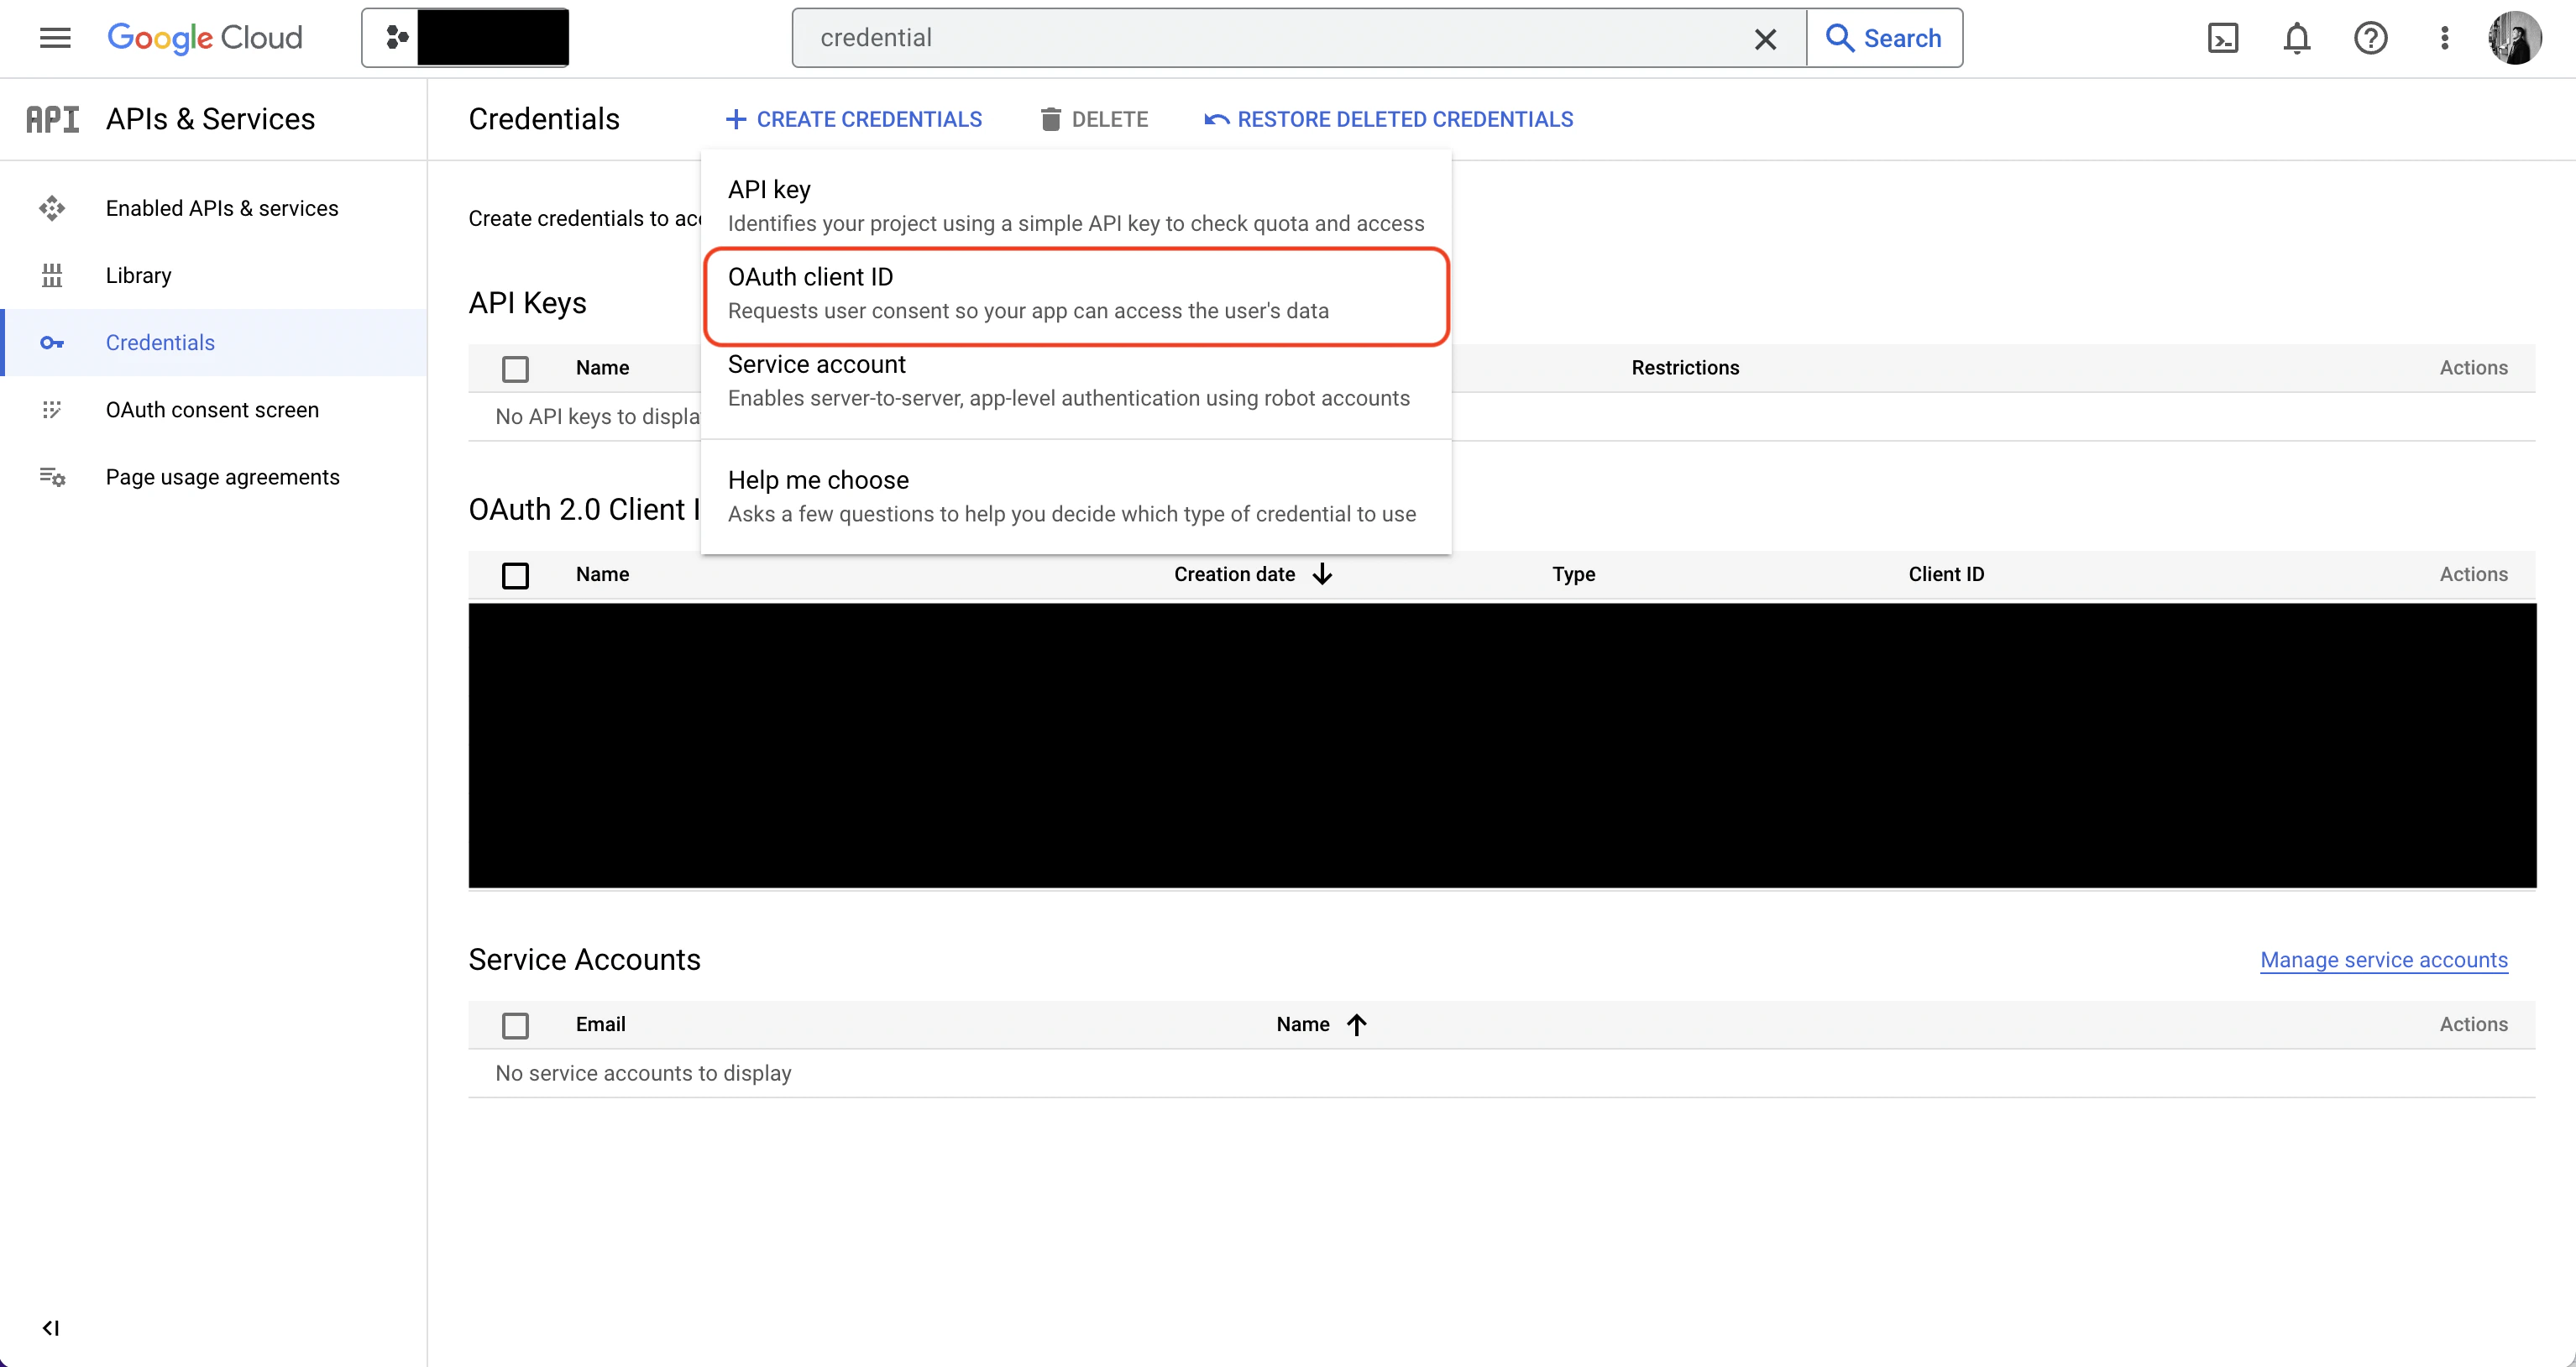
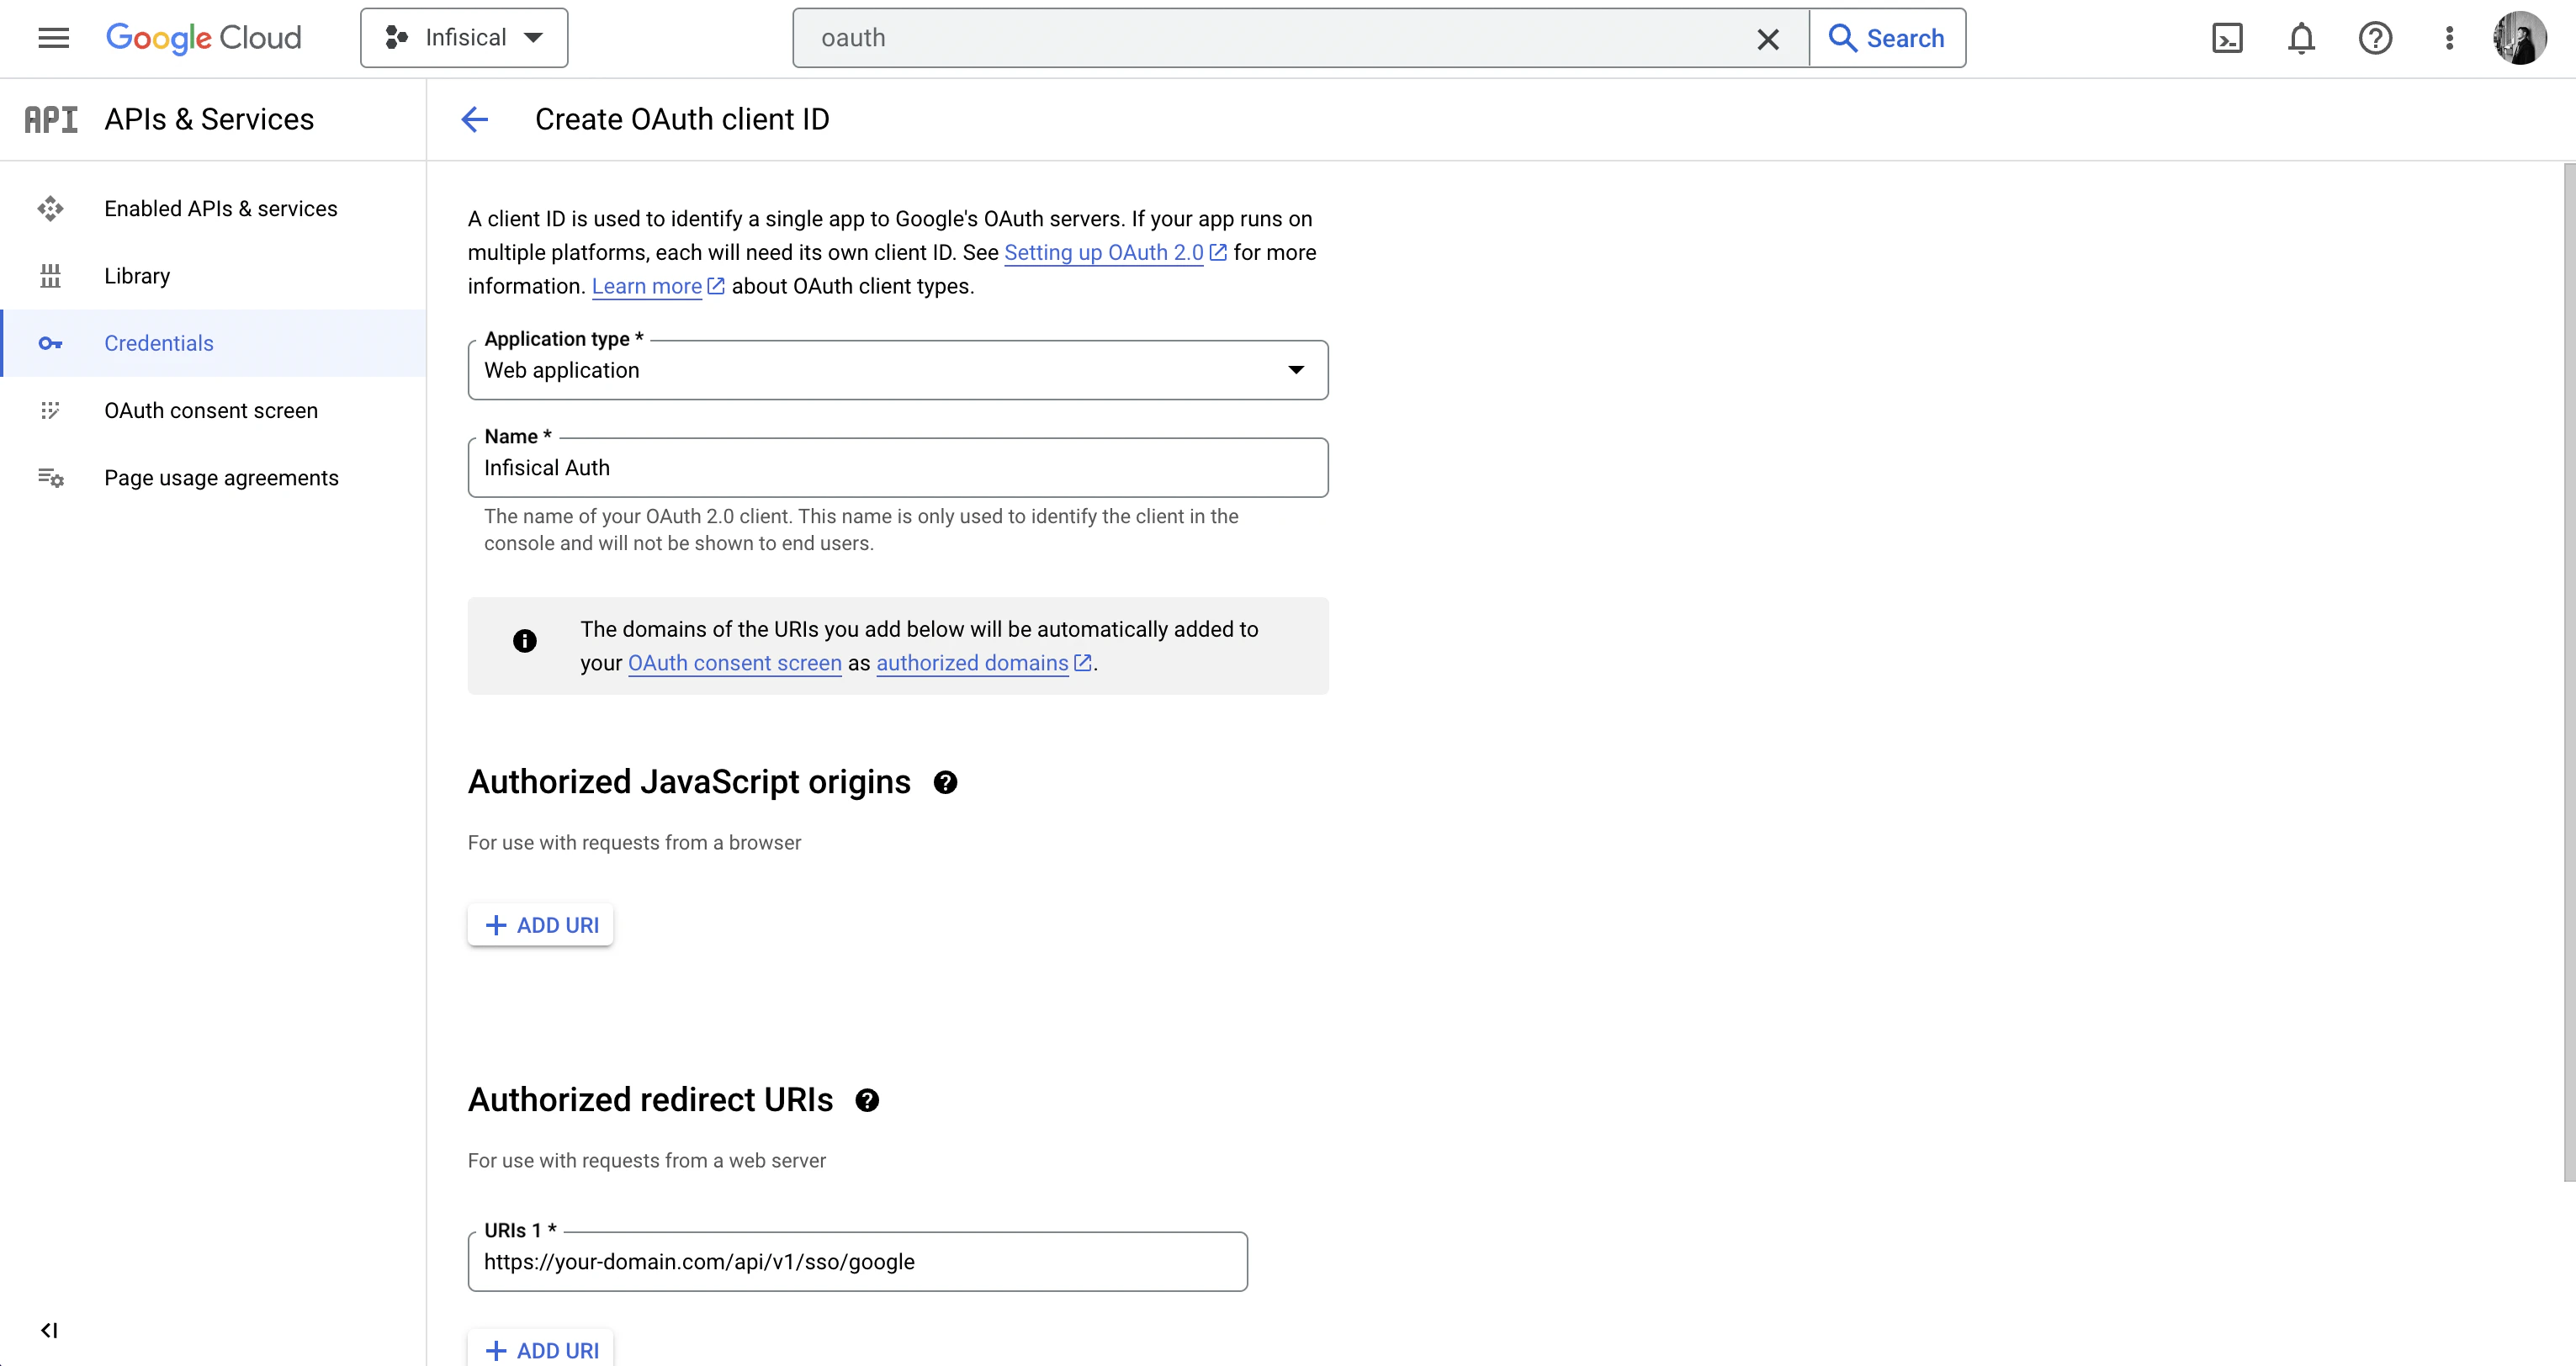
http://localhost:14321/v1/auth/oauth/google/callback for local development, or https://agent-vault.example.com/v1/auth/oauth/google/callback for production.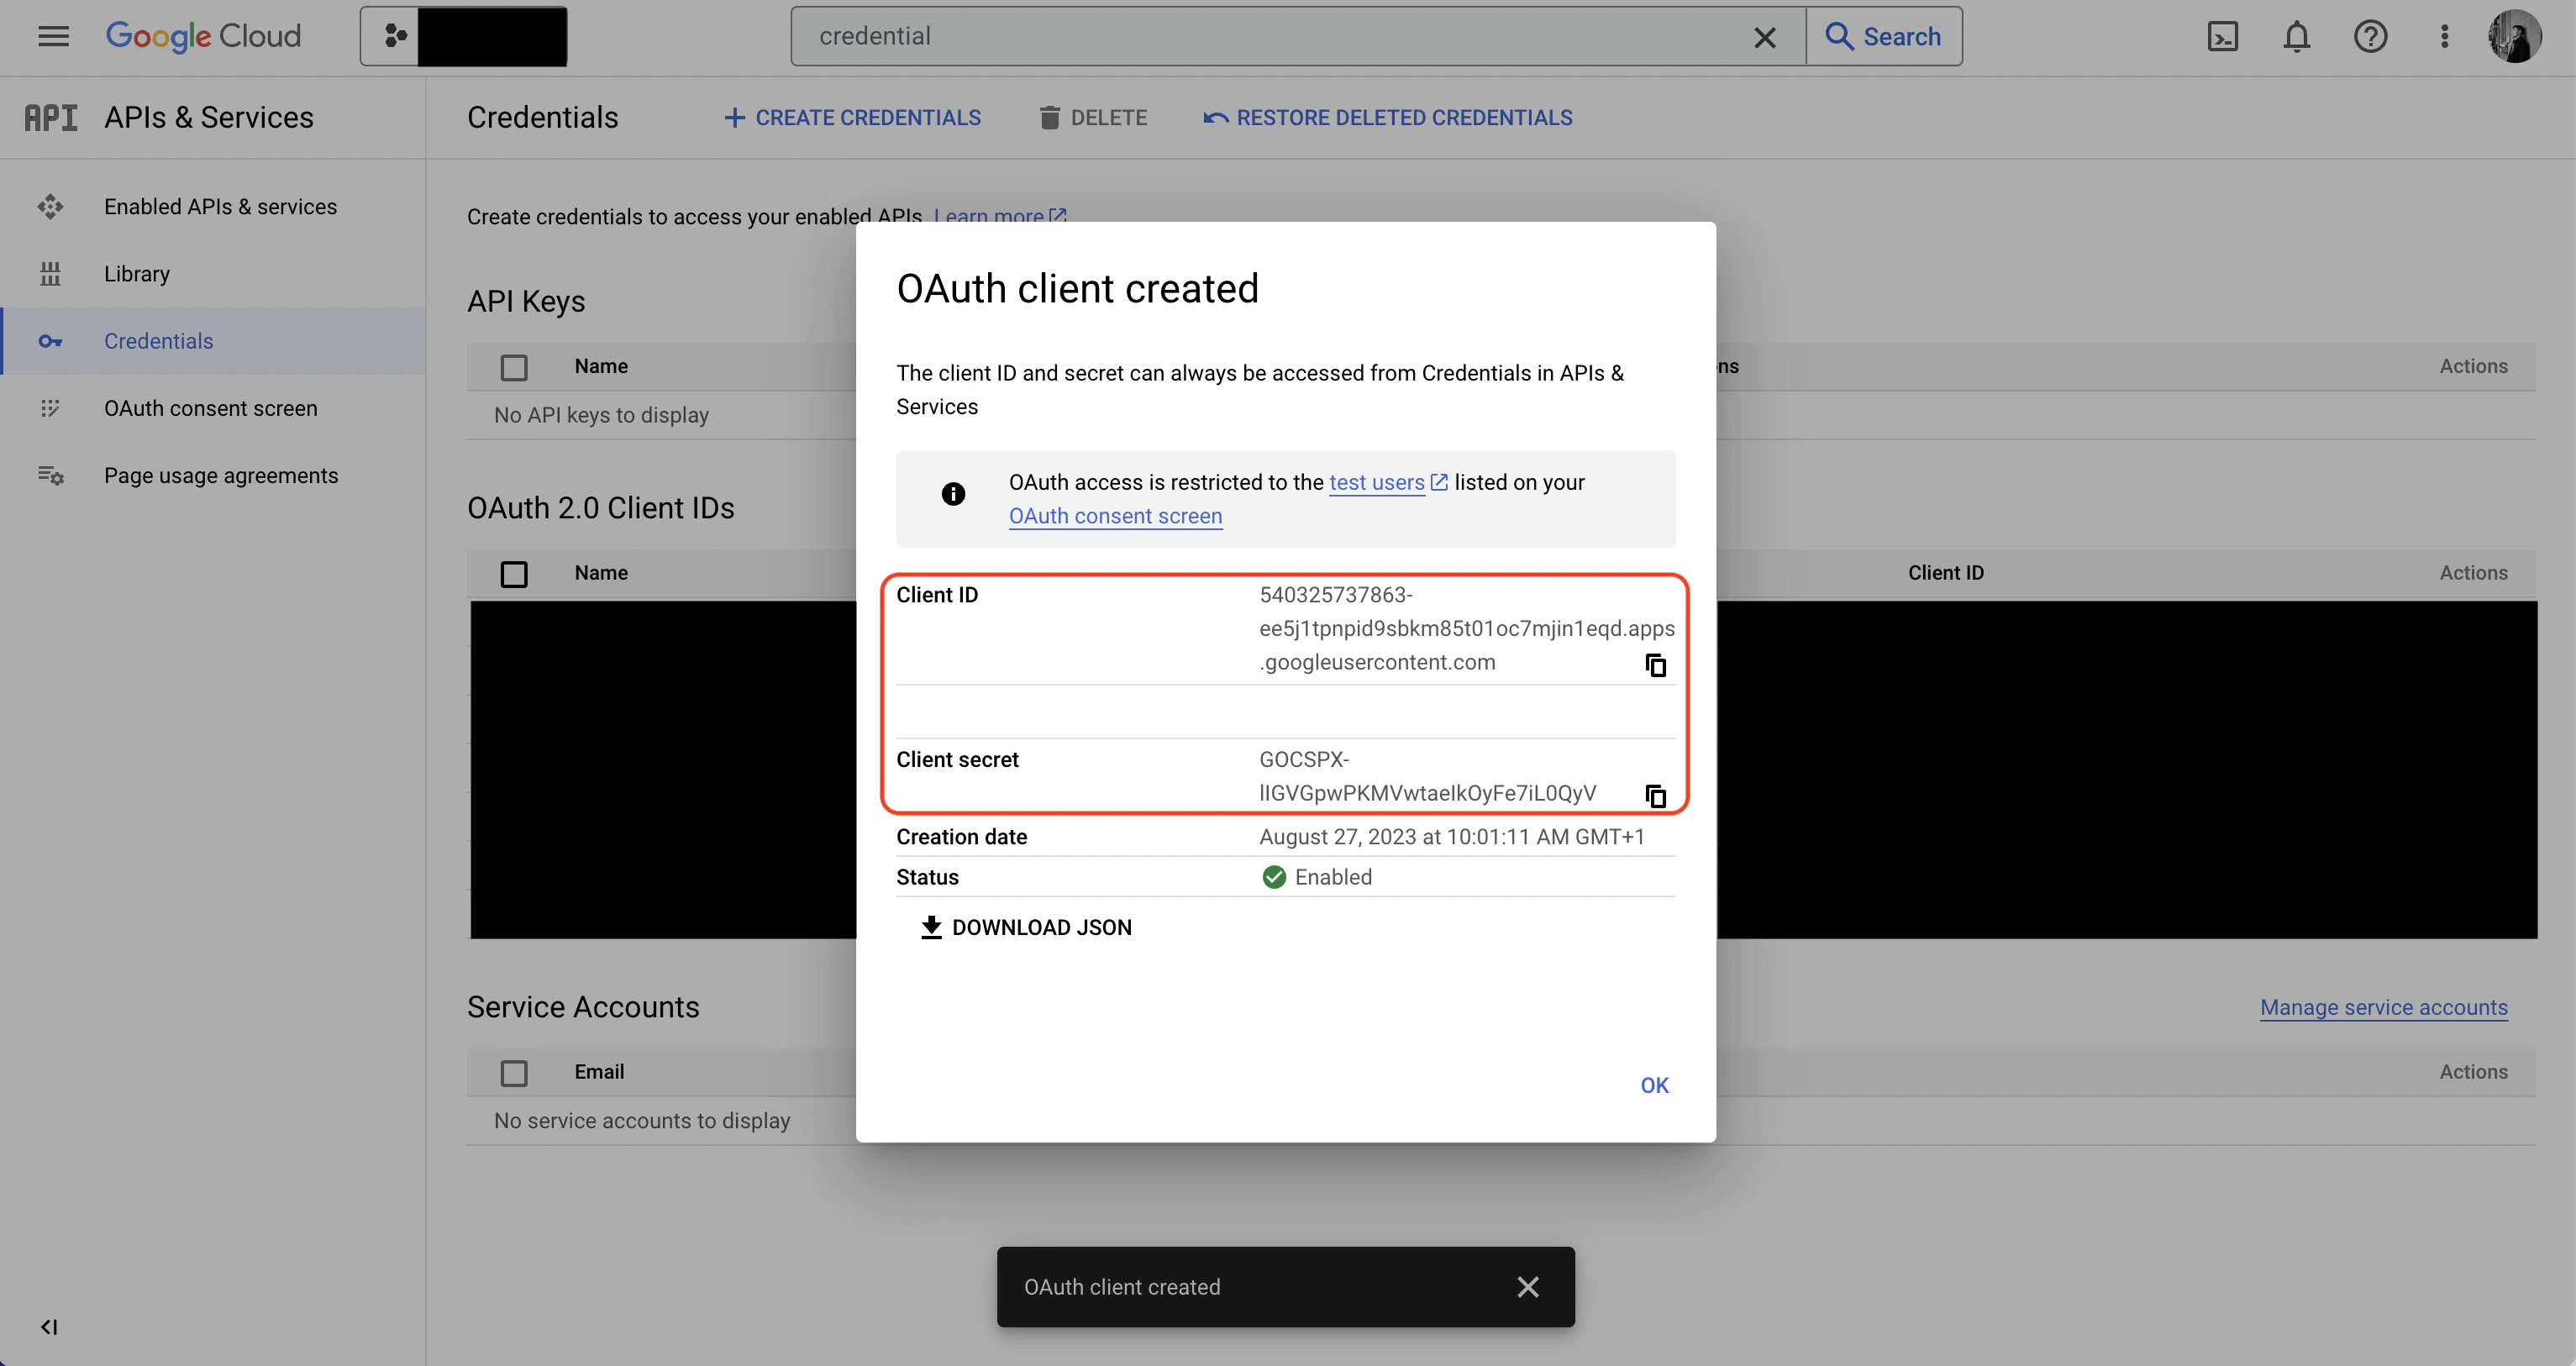
Configuring Agent Vault
Set the following environment variables on your Agent Vault instance and restart:| Variable | Description |
|---|---|
AGENT_VAULT_OAUTH_GOOGLE_CLIENT_ID | Google OAuth 2.0 Client ID |
AGENT_VAULT_OAUTH_GOOGLE_CLIENT_SECRET | Google OAuth 2.0 Client Secret |